maj 26, 2013

The American Angle


http://betterdecoratingbible.com/tag/decorations/


This time I have chosen to feature an American inspered table setting. The elements would as such not be diffecult to find:

1. White and red stribed cloth
2. red lanterns  and metalic pots - could be any color and you could DIY them red
3. Blue glasses.

I am especially fond of the detail with the stribed ribbon on the flowers.

Paper cone wreath

tutorial

Today´s featured DIY is a very comon idea of a paper cone wreath. I would however like to point out the idea of framning it and hangning it on the frame. I think that the option to interchange the "things" in the frame aka some thing for easter and another for christmas.


Other ideas

Todays DIY

I must say I think I am getting close to todays DIY - moveable centerpieces


Source

For this project, I gathered
  • an old canvas
  • acrylic craft paint
  • my Silhouette Studio Designer Edition software
  • my Silhouette Cameo.
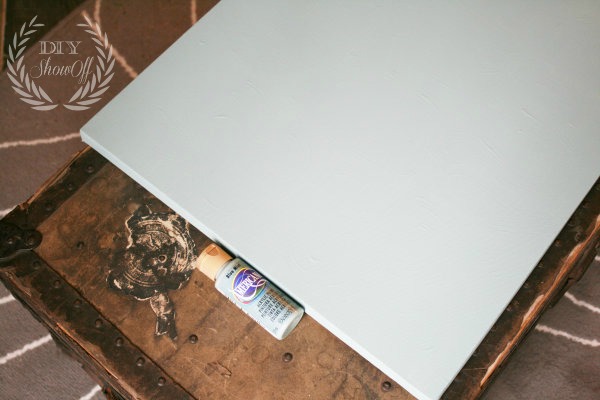
Since I had messed up the canvas with a previous DIY fail (yes, it happens!), I gave it a coat of soft blue acrylic paint to cover up my error to create a blank slate. The texture of the failed project shows through a bit, but imperfection is charm and a little texture isn’t such a bad thing. :)
diy-canvas-sign
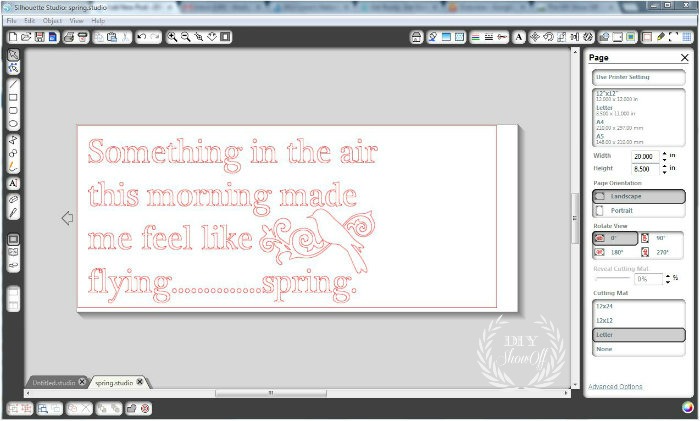
I created my spring stencil using the Silhouette Studio Designer Edition software which allows me to select fonts, sizes and shapes to create a stencil template. Then simply ‘send’ to cut…
silhouette-studio-designer-edition
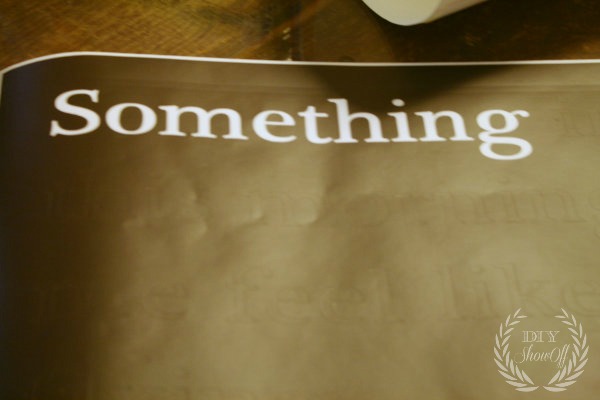
Since I’m using my vinyl as a stencil, I removed all of the letters (these can also be saved to use in the same was as stickers or transferred directly to wood or glass as a vinyl transfer).
weeding-vinyl
Use transfer paper over top of the stencil to transfer the vinyl stencil to the canvas. Rub into place and peel away the transfer paper.
DIY-transferring-vinyl
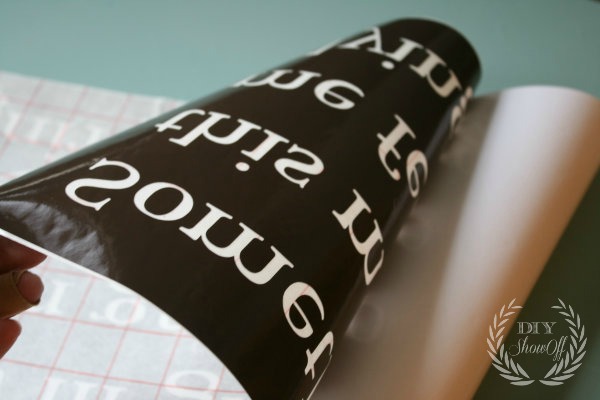
It’s not quite that simple. Vinyl doesn’t stick so well to canvas, so it takes a lot of patience. Go slow.
diy-vinyl
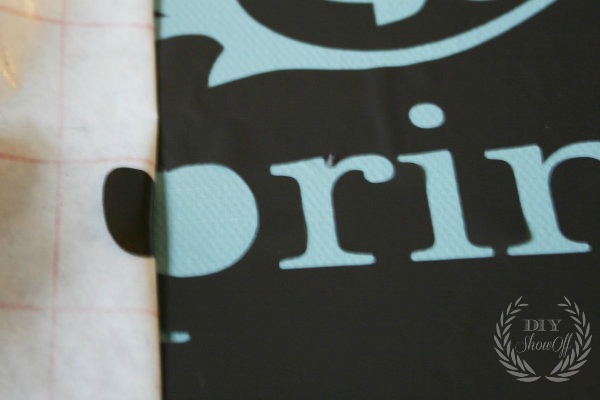
The stencil is all ready to go.
diy-vinyl-on-canvas
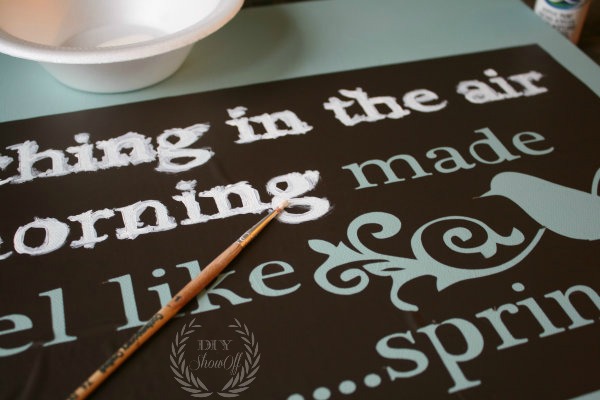
I filled in my lettering with white acrylic craft paint. Since the vinyl does not have a great seal, I’m using my stencil as a guide and filling in the letters with a little bit of paint on the brush, pressing down the vinyl as I work on each individual letter. Slopping it on, will get under the vinyl.
diy-painting-sign
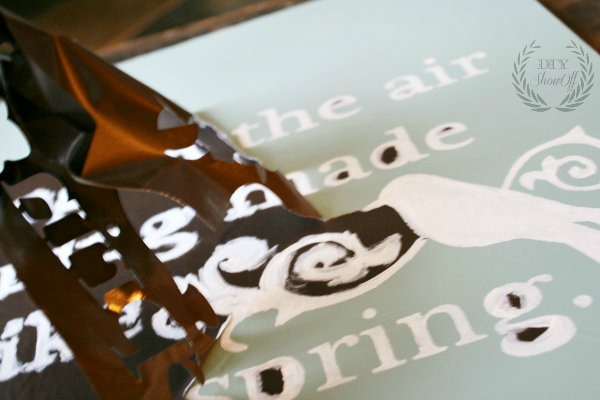
Next, I carefully removed the vinyl stencil as soon as I finished painting and let my canvas dry.
removing-vinyl-stencil
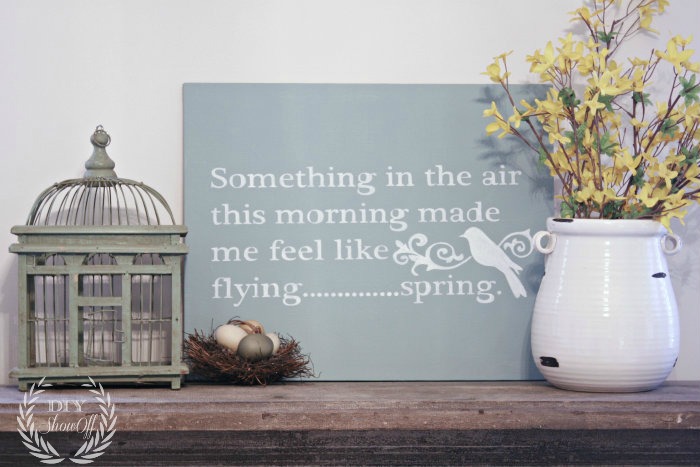
Then just collected some of my favorite spring-y decor and created a vignette around my DIY spring sign as a focal point. Good bye winter blues!
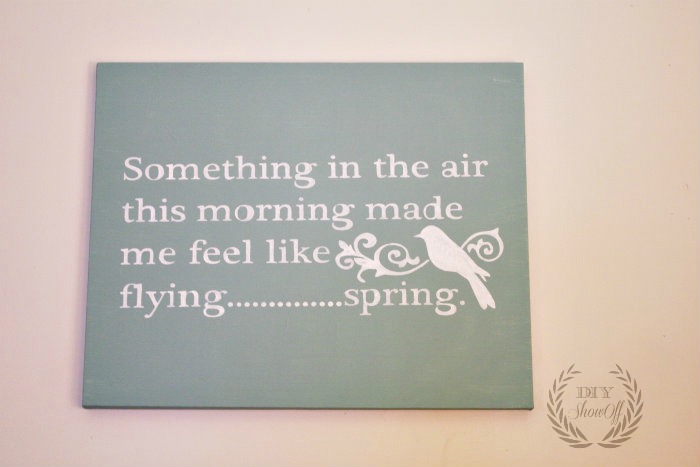
spring-Silhouette-DIY-sign
Hello spring!
Silhouette America is running a crazy spring special you won’t want to miss! Just use the code “SHOWOFF” at checkout {affiliate link} now through March 8th to take advantage of the discount prices.

Read more at http://diyshowoff.com/category/crafts/art/#RzlthQqithTELudR.99

moveable centerpiece

http://www.meadowlakeroad.com/category/mantel

Oh so lovely as some of you know I am really reallly fond of interchangeable items.

Aha interchangable


Organize and Decorate Everything The source for the manteldecoration is this blog http://organizeyourstuffnow.com/

Mantel styling

maj 19, 2013

Louisville Wedding Blog - The Local Louisville KY wedding resource: Vintage Paper Flowers at your Wedding

Louisville Wedding Blog - The Local Louisville KY wedding resource: Vintage Paper Flowers at your Wedding: Source   A great thing about paper flowers, is that not only are they unique, they'll last longer than real flowers and you can i...

With the tutorial

Pinned ImagePretty Tissue Flowers
These delicate petals create an elegant centerpiece whether scattered down the center of a table or piled on a platter. To create, cut a flower shape or 3-inch circles from eight layers of tissue paper. Place in a stack. Next, poke a hole through the stack with a pin. Pull the paper off the tip of a twist tie and insert the exposed wire through the paper layers. Twist the wire to create the flower center. Make the flower bloom by gently pulling up one layer at a time.

Felt flowers

Flowered Pillows

Flowered Pillows Embellish a plain store-bought pillow with funky felt flowers. Cut simple five-petal flower shapes from felt in various colors, then layer several graduated sizes to make one flower. Using a needle and thread, stitch through the centers of the flowers to tack them together. After you have created about a dozen flowers (or more for a larger pillow), stitch them to the pillow surface, bunching them tightly together to create three-dimensional blooms.
Editor's Tip: Thick, stiff felt works best for blooms that won't wilt, but you can cut flowers from any fabric that doesn't fray, such as fleece.

How to

Pinned Image

Cleaning tips


Oven cleaner: 5 T baking soda, 4 T vinegar, 3 drops of Dawn and mix into a paste. Coat the oven, let sit for 15 min and scrub clean. Say NO to Fumes


Soak orange peels in vinegar for two weeks in a sealed mason jar then pour the vinegar into a spray bottle. Use as a non-toxic and yummy smelling green cleaner. I love using vinegar to clean with but have always wondered how to make it smell better. Maybe lemons too??

cleaning tips 1


Pinned Image

Gift bag DIY

Basic wardrobe - black and white

Source: simple-wardrobe.polyvore.com via Erin on Pinterest

The basics

The planned packing list

Beige and chick

Source: polyvore.com via Erin on Pinterest

For the love of grey

Styling

Living mantra

Styling a Bookcase

Styling a Bookcase

OHHHHH.....that is the perfect quote for my headboard

Source: etsy.com via Erin on Pinterest

Could this be made by paper flowers????

Now see I have some lavender paperroses left over from the wedding...and I have some sliver vases

Still centerpieces