 I like this ...but wayyy to complicated for my home and I would be annoyed when the greenery started to crumble.
Viser opslag med etiketten decoration. Vis alle opslag
Viser opslag med etiketten decoration. Vis alle opslag
november 28, 2014
No - to the decoration
I like this ...but wayyy to complicated for my home and I would be annoyed when the greenery started to crumble.
Style and Themes
I am torn between the fake greenery:


Or no greenery at all:


I know what I don´t want:

Or no greenery at all:
I know what I don´t want:
So what to do next?
Well first up: what sort of Christmas colors or theme would I like?
 Theese colors might be nice.

this one .....Just for the look in the front yard

Theese colors might be nice.this one .....Just for the look in the front yard
Home decor the easy way
As you can tell.....Kristy changes the pillows and the tablesetting and nothing else. All Photos are Kristys.


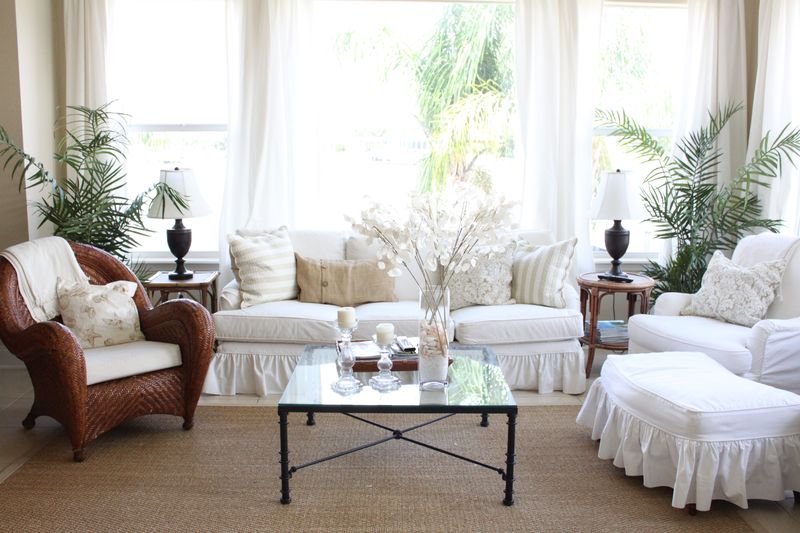
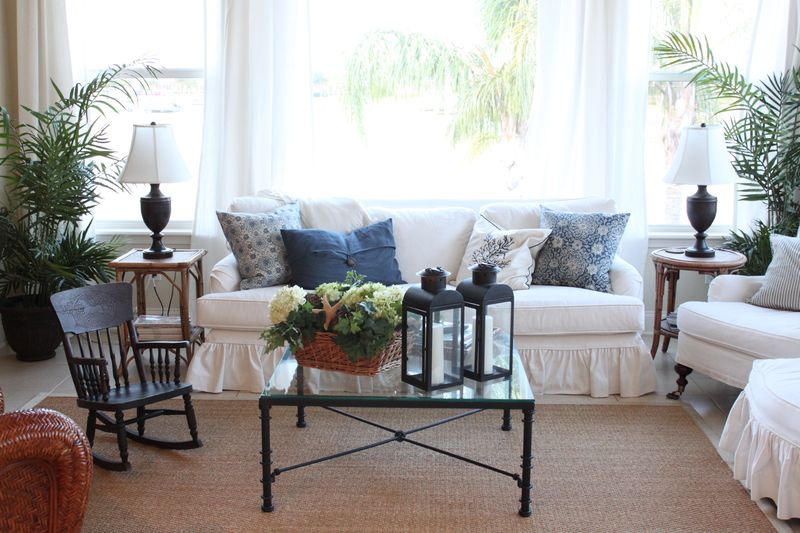
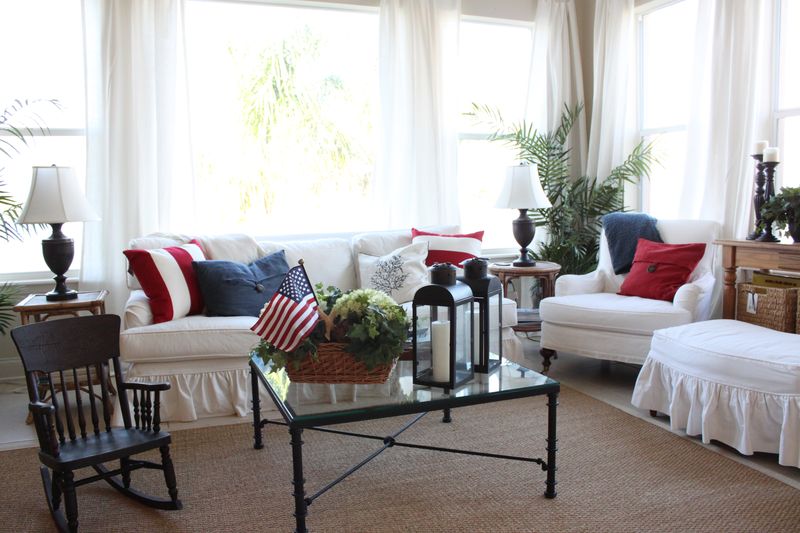

Seasonal decor Ultimate inspiration
Starfish Cottage
I owe a huge thanks to "between Naps on the Porch" for directing to Kristys Starfish Cottage blog. Truely usefull and interesting blog for home decoration:

I owe a huge thanks to "between Naps on the Porch" for directing to Kristys Starfish Cottage blog. Truely usefull and interesting blog for home decoration:

Decorating one on one
I have allways been inspired by Elana Morgan at Elena Blog

This year I also found new inspiration
1. Start with one big piece that is centered- example above is the large mirror in the background
2. Create movement – example above would be the candlesticks. They are similar objects but varied heights
3. Add visual weight – example above would be the ginger jar. It is large and visually heavier than the other pieces
4. Layer art and photos – Vary the sizes and heights
5. Add accessories of varying heights – example above are the wooden boxes behind the ginger jar


This year I also found new inspiration
1. Start with one big piece that is centered- example above is the large mirror in the background
2. Create movement – example above would be the candlesticks. They are similar objects but varied heights
3. Add visual weight – example above would be the ginger jar. It is large and visually heavier than the other pieces
4. Layer art and photos – Vary the sizes and heights
5. Add accessories of varying heights – example above are the wooden boxes behind the ginger jar
november 01, 2014

maj 26, 2013
The American Angle

http://betterdecoratingbible.com/tag/decorations/
This time I have chosen to feature an American inspered table setting. The elements would as such not be diffecult to find:
1. White and red stribed cloth
2. red lanterns and metalic pots - could be any color and you could DIY them red
3. Blue glasses.
I am especially fond of the detail with the stribed ribbon on the flowers.
maj 19, 2013
With the tutorial
 Pretty Tissue Flowers
These delicate petals create an elegant centerpiece whether scattered down the center of a table or piled on a platter. To create, cut a flower shape or 3-inch circles from eight layers of tissue paper. Place in a stack. Next, poke a hole through the stack with a pin. Pull the paper off the tip of a twist tie and insert the exposed wire through the paper layers. Twist the wire to create the flower center. Make the flower bloom by gently pulling up one layer at a time.
maj 03, 2013
For thoose summerparties
 source
What You Will Need:your chosen fabrics
pinking shears
ruler
fabric chalk(or soft pencil will do)
pins
string
sewing machine
pinking shears
ruler
fabric chalk(or soft pencil will do)
pins
string
sewing machine
I used clothes line string from the hardware store. There were 2 kinds. The cotton string and sythentic string. I recommend the synthetic string because it was much lower in price, and it is much easier to sew the pennant flag onto the string with the sewing machine.
Instructions:
1) Cut your Fabric – These are the dimensions I cut all my flags, but how wide and long your flags are completely up to you. I have seen a lot of very fun flags that were all in different sizes. Experiment and have fun! The extra rectangular piece of fabric above the triangular flag is the part you will need to sew on the string.
2) Attaching the flag on the string - Place the string over the rectangular portion of the flag, and roll the fabric over the string.
3) Pin the Flag Down
4) Sew the Flag - You may want to test if your sewing machine will sew over the fabric and string you choose.
5) You are done with your first Flag! - I space mine 12′ inches apart and repeat till you have your desired length.
I really really like this setting from Country life
 items need:
Can to paint and paint of course
table cloth with ribbon
inexpensive flowers
marts 31, 2013


maj 28, 2012
My new addiction
Fancy fabric flowers two ways: tutorial
Thank you all for your comments and help about my work-in-progress silk party dress! I loved reading all your ideas--there were so many of them, most of which I hadn't considered! Some of you said add a belt, some said do some self-fabric flowers, and some said it's classy and simple the way it is. I still don't know exactly how I'll wear it, but I think the key is versatility and how fun it is to change it up!
 I wanted to start with trying the fabric flower idea. The perfect way to do a fabric flower but leave the dress open for other options is with a flower pin. Luckily, I have an idea for a super easy way to make fabric flower pins out of the extra fabric! I'd love to share the tutorial (s) with you.
Let me start by saying that I do not often make fabric flowers. Hand-sewing frustrates me and I usually prefer making larger things, following a set pattern with different pieces that fit together. But I've found a way that works for me, and I actually enjoy making these little flowers! So often I look at fabric flowers and am confused by the construction, but I guarantee these ones are super easy to make!
Here's the basic tutorial, for a fun fabric flower you can make out of one, two, or maybe even three types of fabric. All-one fabric would be pretty, but since I have the silk organza and the poly lining of the exact same color, I'm going to go with two. So here's what you do:


 Do this to all the petals.
 Imagine the base flower is divided into quadrants, like it has been by my folding it in quarters to find the center.


 Here's how they look on the dress. Don't know exactly what I want to do with them... at the waist? Maybe over a self-fabric belt?
 At the top?
 So there it is. I still have no idea how I want to wear the dress, but at least I have some fun options!
My new addiction:http://www.adventuresindressmaking.com/2010/10/fancy-fabric-flowers-two-ways-tutorial.html

Let me start by saying that I do not often make fabric flowers. Hand-sewing frustrates me and I usually prefer making larger things, following a set pattern with different pieces that fit together. But I've found a way that works for me, and I actually enjoy making these little flowers! So often I look at fabric flowers and am confused by the construction, but I guarantee these ones are super easy to make!
Here's the basic tutorial, for a fun fabric flower you can make out of one, two, or maybe even three types of fabric. All-one fabric would be pretty, but since I have the silk organza and the poly lining of the exact same color, I'm going to go with two. So here's what you do:
- Cut 11-13 circles. Cut one extra-large one, 4 large ones, 4 medium ones, and 2-4 small ones, depending on the fluffiness you want and the stiffness or thickness of the fabric. You can cut circles by tracing Tupperware lids, or by cutting squares and then lobbing the corners off carefully. They don't have to be perfect!!

- Fold the circles in half, then into quarters, then cut petal shapes out. Again, no need for perfection, but try to make your petals pretty and rounded, even if they're not all the same size.


- On the extra large circle, mark the center with a fabric pen. Fold the four large circles into quarters and sew them, with 2-3 stitches, to the center of the base flower.


- Continue this method with all four large petals.

- Now for the second layer! Using the medium petals, sew them down on an angle from the original four quadrants so that each of them covers the fold between the original ones. It makes more sense in pictures.

- Continue with all the medium flowers, then the 2-4 smallest ones. At this point, the flower will be sort of puffy and you don't need to worry too much about perfectly covering the folds of the lower layer, and you can sew the 2-4 inner petals on whichever angle you choose, as long as their centers match up with the base flower center.
- Now for the pin. You'll need some pin backs (I got this package for about $1 at JoAnn's).

- Sew the pin back onto the flower. Go through all three holes, anchoring on both sides of the pin!

- And you're done.
Now, after I made this flower, I thought... one flower on a dress? Could be kind of boring. I wanted to make another one!
I thought, what would it look like if I used a less symmetrical approach? Rather than one whole layer of opaque flowers, what if I just mixed in the different types of petals? So I'll show you now another version. Here, cut 1 base flower, 4 large flowers, 4 medium flowers, 4 small flowers, and, if you like, 2-4 extra small flowers. This flower has more petals than the other!

- Same as before--fold the large petals into quarters, and sew onto your base flower.

- Continue with the other large flowers--if you're using two different fabrics, like me, I suggest alternating them. See; I have sheer, opaque, sheer...

- Sew on the medium layer, again, covering the folded edges of the lower layer.

- Once you get to the end, it should be quite 3-D, so sew the smallest flowers in however you like.

- Sew the pin back on as before.
Here are the two flowers!! The more symmetrical one is the larger one; the more free-form one is the smaller. They're very similar in that they both have the curved petal edges (wouldn't this be fun if you cut the petals pointy?!) and are put together the same way, but they do have different looks.


My new addiction:http://www.adventuresindressmaking.com/2010/10/fancy-fabric-flowers-two-ways-tutorial.html
How simpel yet pretty
wineglass diy wedding centerpiece…
23rd April, 2012 - Posted by Lia - No Comments

Here is a super easy way to showcase some of your favorite stemware and assemble chic centerpieces at the same time. Rather than purchasing new vases or containers to house flowers, gather some of your favorite goblets, wine glasses and the like. Arrange glasses upside on your tabletop and display a large, fresh-cut and colorful bloom beneath each glass (no water needed!). Then, decorate the “bottom” of each glass with a decorative votive (preferably soy or beeswax) for a fun and feminine (and fast) wedding tabletop centerpiece!
Source: http://www.somethinggreen.com/
maj 10, 2012


Abonner på:
Opslag (Atom)